Viral AI photos: how to make them in one evening in 2026
Which AI tools people use to make viral photos in 2026 - from Nano Banana to Midjourney, the formats that pop off in Reels, Stories, and Threads, and how to build a whole series of share-worthy shots in a single evening. With ready prompts, a tool comparison, and a step-by-step walkthrough for a total beginner.
Here's how a viral AI photo gets made: pick a tool (the easiest is the free Nano Banana inside Gemini), upload 1-3 of your own photos, write a prompt with the format and style (for example, "turn me into a collectible figurine in a blister pack"), get a shot in 10-30 seconds, and refine the details by plain words. In one evening you can realistically build a series of 5-10 shots for Reels, Stories, and Threads. You can start free in Nano Banana and ChatGPT; for top quality people reach for Midjourney, from $10 a month.
You're scrolling your feed, and the same person has managed in one week to become a movie hero, a collectible figurine in a blister pack, and the star of a grainy '90s film reel. Every shot pulls hundreds of thousands of views out of nowhere. And you look at your phone's camera and think you can't do that.
You can. All of it is made in an evening, often for free, with no photographer and no Photoshop - just AI and a couple of lines of text. I run four client projects and a personal channel with 20,000 followers, and a noticeable chunk of the visuals there is built exactly this way. In this article: all the tools, all the trending formats, and the exact prompts, so you can repeat it today.
It's a 22-minute read. You'll get your first photo about ten minutes after you start. By the end of the evening you'll have a series of shots that covers a whole week of content.
What's inside
- What makes a photo go viral, and why AI nails it in an evening
- 7 AI tools for viral photos - compared
- 8 viral formats of 2026 with ready prompts
- How to make a viral photo in an evening - step by step
- Where to post viral photos and how to boost reach
- How to write a prompt for a photo - the formula
- Claude as a prompt generator
- 6 mistakes that keep a photo from going viral
- Checklist: a viral photo in one evening
Section 01What makes a photo go viral, and why AI nails it in an evening
A viral photo is a shot you want to send to a friend with the caption "look, I want one like this." Shares and saves are the main signals for the algorithms behind Reels, TikTok, and Threads. They're what push a photo into the recommendations of people who don't follow you. A like says "nice"; a share says "this is worth showing others," and the second action carries far more weight.
Break down the photos that popped off in recent months and the virality rests on three things.
- A recognizable format. People have already seen a dozen similar shots in the feed - figurines, cinematic portraits, retro film. The format works like a meme: it reads in a split second.
- An easy "I want to do that too." To copy it, you don't need a studio or a budget. Your own photo and a phone are enough. The barrier to repeat is close to zero, and people share it with "let's do this."
- An instant emotion. The shot triggers surprise, warmth, or a laugh in the first second. There's no pause of "wait, what's even happening here."
A shot like that used to need a photographer, studio lighting, and hours of retouching. Today AI holds your face and drops it into any scene from a text description. In the fall of 2025 the Nano Banana model inside Gemini pulled in 13 million new users in four days and over 5 billion generated photos - mostly riding exactly that "upload yourself and become anyone" trend. That's the mechanic you're about to learn.
What you'll need tonight
- A phone or a computer with a browser.
- 1-3 of your own photos in good light - straight on and three-quarter, face large and in focus. The sharper the source, the better the AI holds the likeness.
- Access to one of the tools below. A free one is enough to start.
- One free evening and the itch to try five or six formats.
No editing, no image editors. All your talking to the AI happens in plain words, as if you were explaining the task to a designer friend.
Section 027 AI tools for viral photos - compared
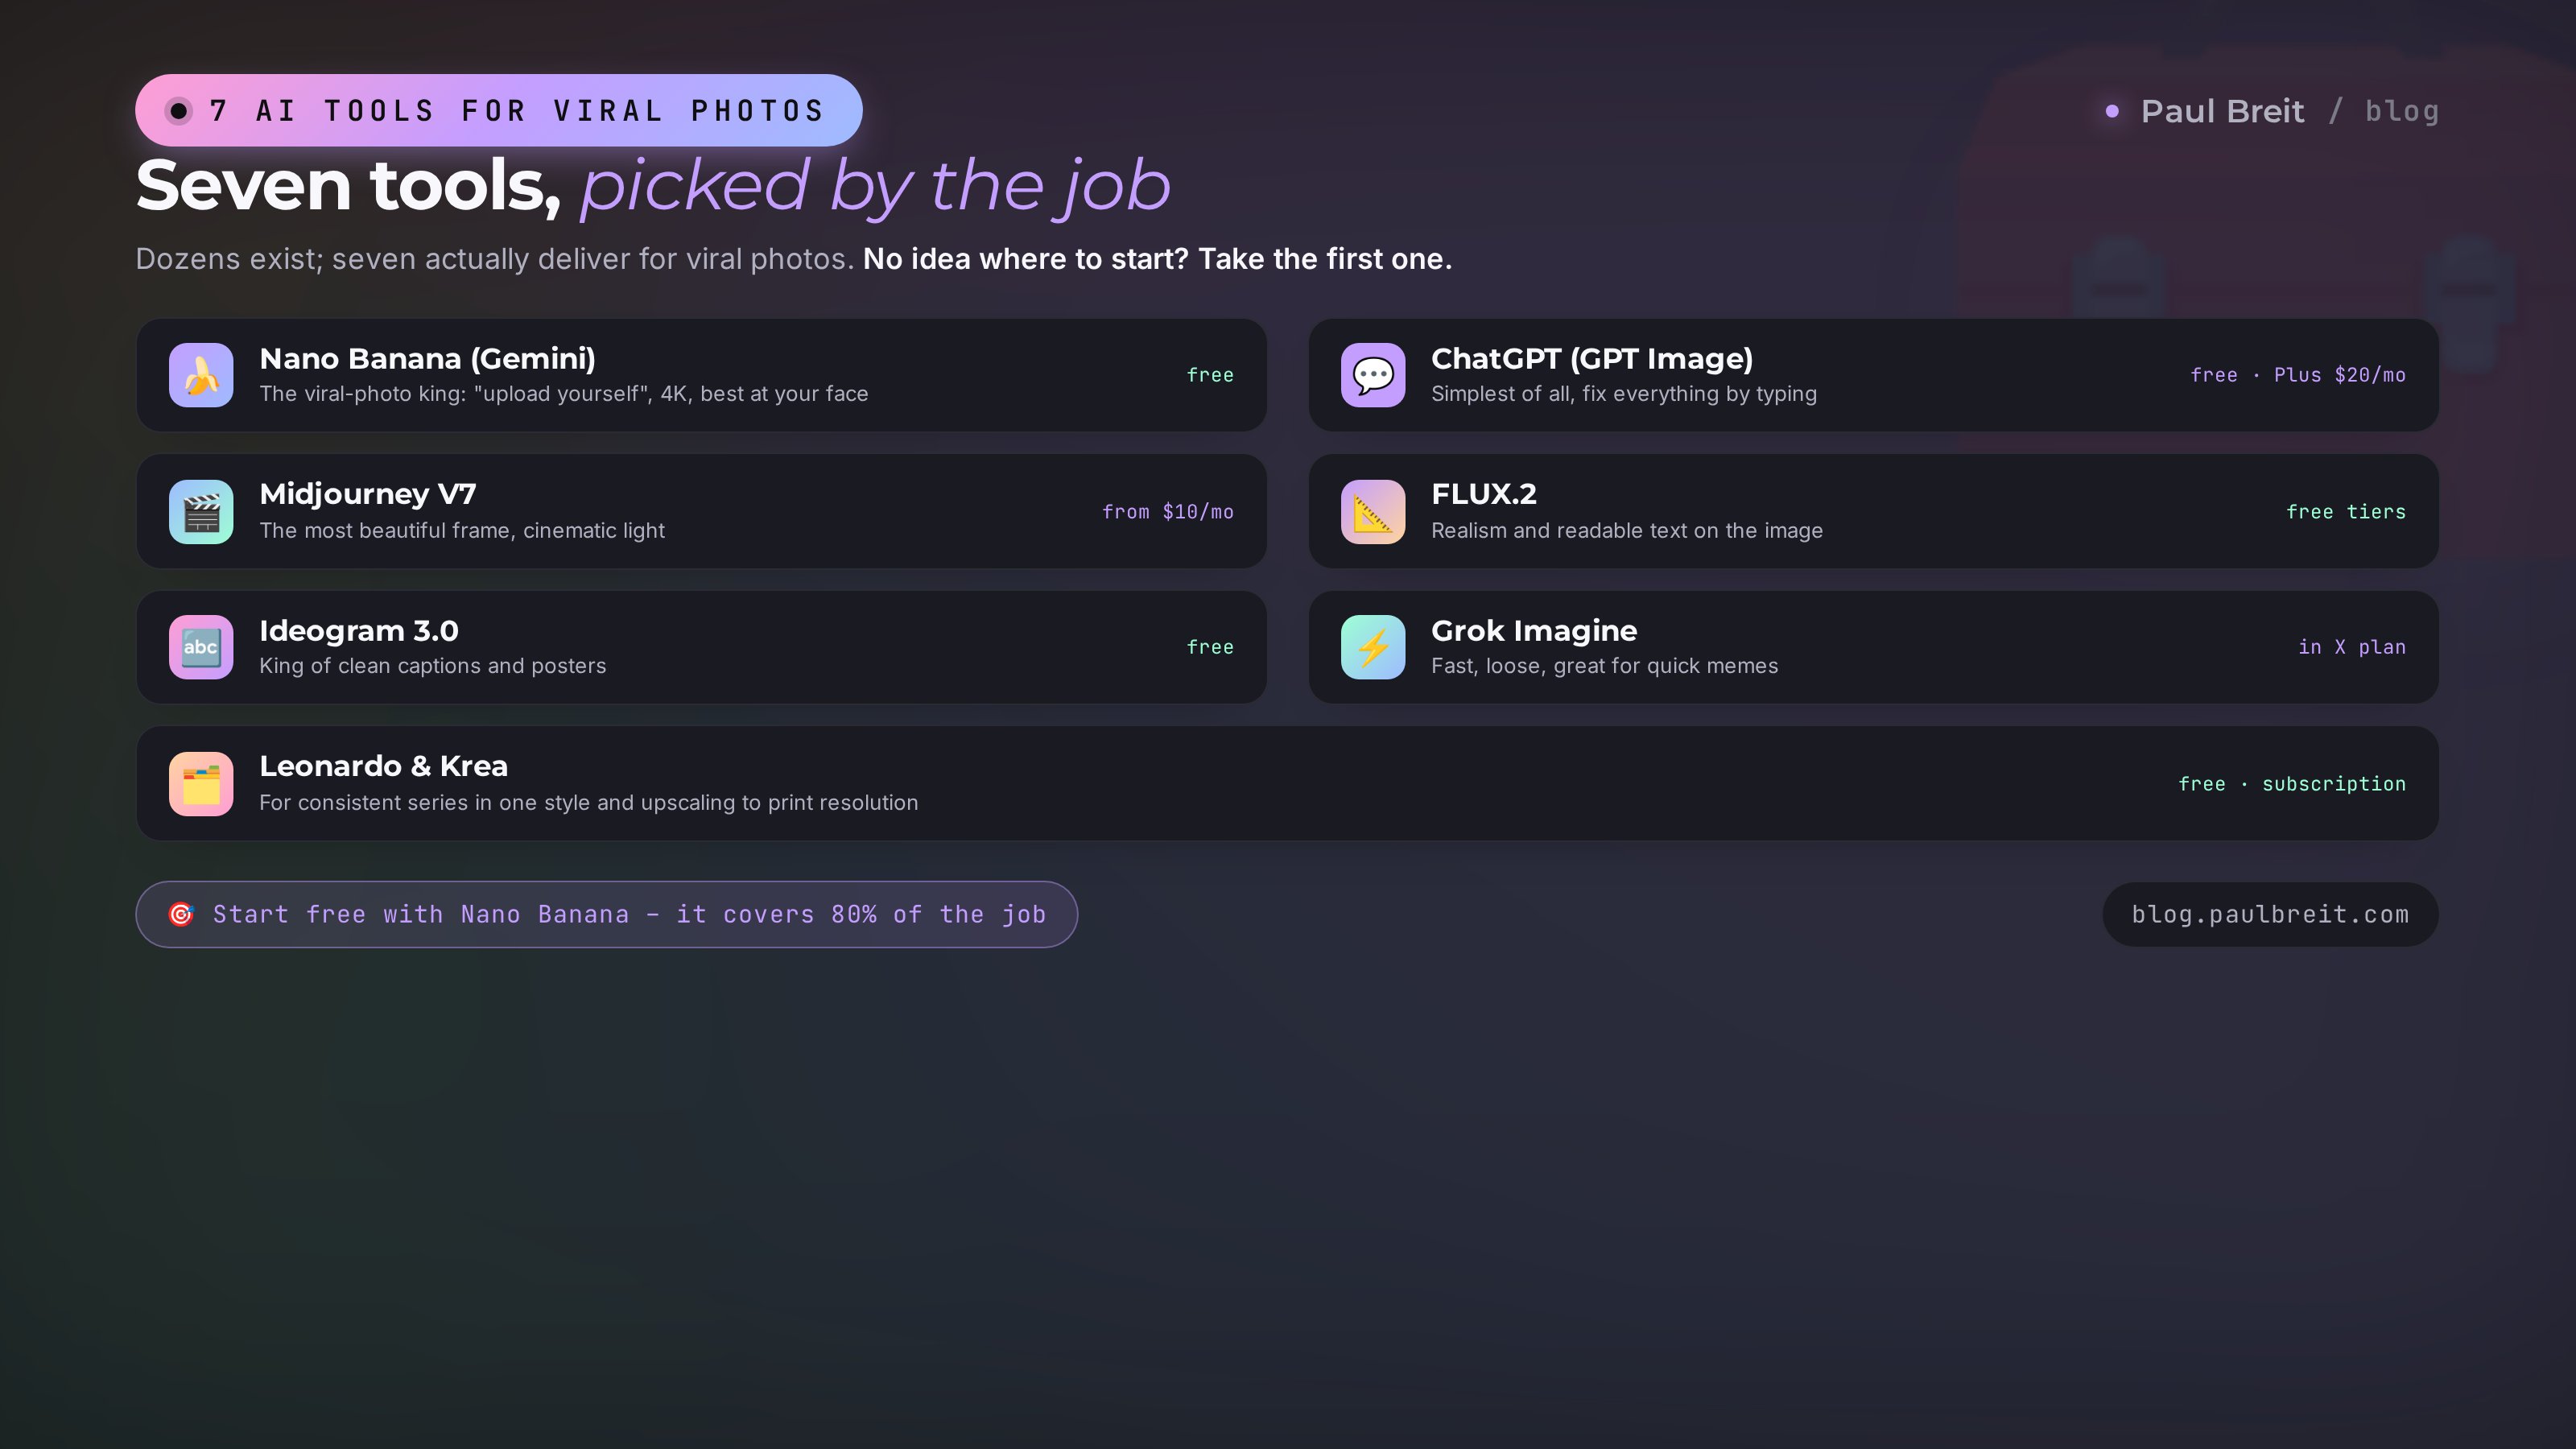
There are dozens of tools, but seven actually work for viral photos. Below is an honest take on each: what it's strong at, what it costs, whether it holds your face. If you'd rather not choose - start with the first one; it's free and covers 80% of the job.
1. Nano Banana (Gemini) - the king of viral photos
An image-generation model inside Google's Gemini. It's the one that made the figurine and "upload yourself" trend go mainstream. In February 2026 the Nano Banana 2 update landed (also known as Gemini 3.1 Flash Image): it renders up to 4K in ten seconds, follows instructions better, and draws captions cleanly. Upload your photo, write an idea - and get a shot where your face is recognizable. It works free right in the Gemini app and site, with a paid plan for higher limits. This is the best start for a beginner and the main tool for viral formats.
2. ChatGPT (GPT Image) - as simple as it gets
Image generation is built right into the ChatGPT chat. You describe the shot in words, optionally attach your photo, and edit the result the same way - by words: "make the background warmer," "remove the extra hand." Great for anyone who doesn't want to configure a thing. There's free access with a daily limit; the Plus subscription is $20 a month and removes the caps. It holds the likeness moderately well - enough for memes and scenes, but for an exact portrait Nano Banana is stronger.
3. Midjourney V7 - maximum aesthetics
The most beautiful image on the market. In blind comparisons through 2026 Midjourney consistently takes first place for artistry: cinematic light, texture, depth. If you need a cover-worthy, expensive-looking shot - this is the one. It's run from the website and through Discord. The Basic plan is $10 a month (around 200 photos), Standard is $30 with a near-unlimited slow mode. The downside for a beginner: prompts are fussier, and it holds your own face less reliably than Nano Banana. People reach for it less for an exact self-portrait - it shines in artistic scenes.
4. FLUX.2 (Black Forest Labs) - realism and text on the image
A German model praised for following the prompt precisely and for clean realism. It draws readable text and fine detail well. It's available through wrapper services (Freepik, Krea, Together) and via API. People pick it when they need a documentary-realistic shot or a photo with text - a sign, packaging, a poster. The wrappers have free limits; beyond that it's the service's subscription.
5. Ideogram 3.0 - the king of captions
The best AI when the photo needs clean text on it: a poster, a cover, a captioned meme, a sign, a menu. Where other models turn letters into mush, Ideogram delivers even typography. It has a free tier. It's weaker than the top tools for clean portraits, but the moment you need text on the shot, you switch it on.
6. Grok Imagine - fast and with less censorship
The generator inside Grok on the social network X. It works fast, treats subjects more freely, and is built right into the feed. It's handy for quick meme shots and when you need lots of variations in a minute. Portrait quality is middling, but the speed and the easy posting make it convenient for real-time content.
7. Leonardo and Krea - for series and upscaling
Two tools for when you get into it. Leonardo has plenty of presets and comfortable work with series in one style. Krea is good for upscaling (bumping up to print resolution) and fast real-time edits. People use them for a consistent batch of shots in one style - for a brand's visuals or a carousel.
Table: what to pick for the job
| Tool | Price | Best at | Holds your face |
|---|---|---|---|
| Nano Banana (Gemini) | Free / paid plan | Viral formats, "upload yourself," 4K | Excellent |
| ChatGPT (GPT Image) | Free / Plus $20 | Edits by words, simplicity | Moderate |
| Midjourney V7 | From $10/mo | Aesthetics, cinematic light | Moderate |
| FLUX.2 | Free limits / subscription | Realism, text on the image | Moderate |
| Ideogram 3.0 | Free / subscription | Clean captions, posters | Moderate |
| Grok Imagine | In the X plan | Speed, memes | Moderate |
| Leonardo / Krea | Free / subscription | Series, upscaling, presets | Good |
A deeper look at image generators for different jobs is in the articles on the best AI tools of 2026 and AI image generators. Here we push on - to the formats that actually go viral.
Section 038 viral formats of 2026 with ready prompts
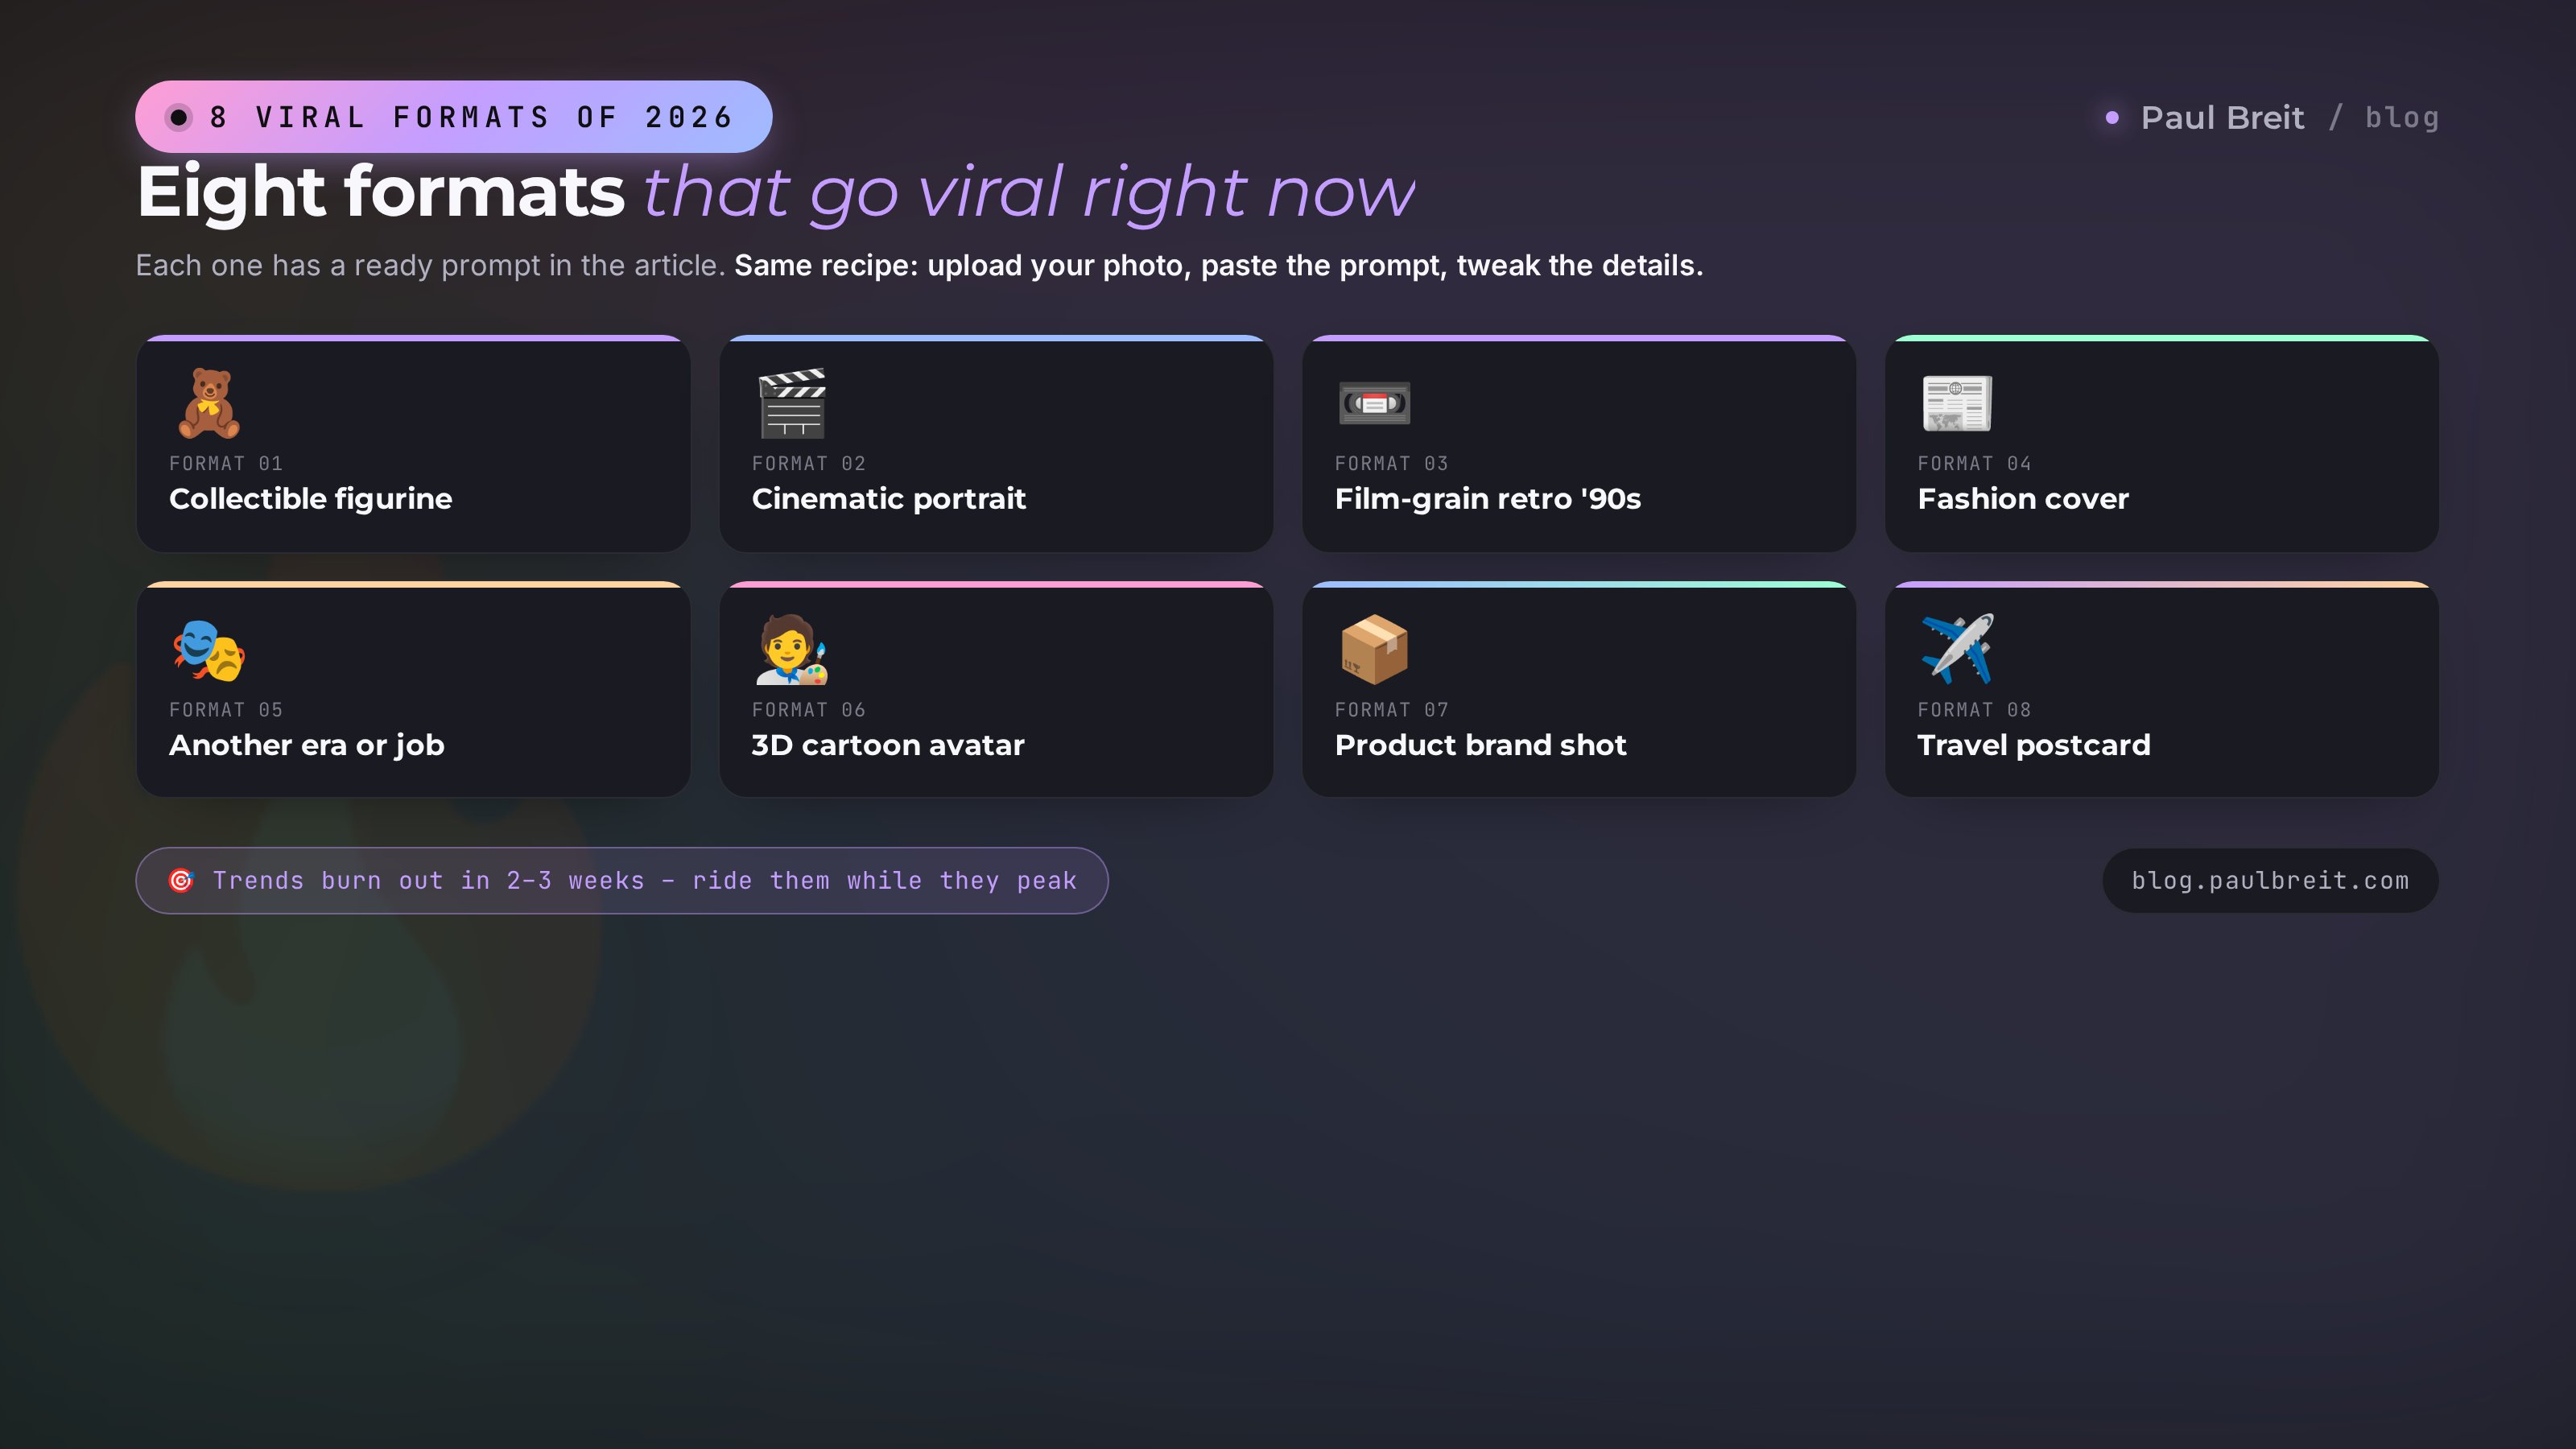
Below are eight formats that land right now. Under each one is a ready prompt. The recipe is the same: open a tool (Nano Banana is the easiest), upload your photo, paste the prompt, and swap in details to fit you if you like. The prompts are in plain English and work as-is in any tool.
Collectible figurine in a blister pack
The trend that started it all. You become a toy figurine in branded packaging with a blister, like something off a store shelf. It works because it's funny, recognizable, and makes people want to "collect" a set of their friends.
Turn the person in the photo into a realistic collectible
figurine inside a plastic blister pack, like a toy off a
store shelf. On the cardboard backing put a large label with
a name and profession, with themed mini-accessories beside it.
Studio light, macro shot, glossy packaging, high detail.
Keep the face exactly.Cinematic portrait - a still from a film
Your photo becomes a still from a big movie: dramatic light, depth, atmosphere. It lands with experts and creators as an "expensive" avatar and cover.
Turn the photo into a cinematic portrait - a still from
an atmospheric film. Soft rim light, warm color grade,
gentle bokeh in the background, film grain. Angle slightly
from below, gaze off to the side. Realism, depth, the mood
of an evening city. Keep the face recognizable.Film-grain retro '90s
One of the biggest trends of 2026 - fatigue with flawless synthetic shots. People are bringing back "alive" imperfections: film grain, light leaks, a date in the corner. Your photo looks like a found old snapshot.
Make the photo look like an old '90s film snapshot: grain,
light leaks, muted colors, a date in the corner in orange
digits, the feel of a cheap point-and-shoot. Clothing and
hair in the style of the era, an interior from that time.
Keep the face.Fashion lookbook and magazine cover
You're on the cover of a glossy or in a fashion brand's campaign. The format gives a high-status, premium shot - great for a personal brand and sales accounts.
Place the person from the photo on a fashion magazine cover.
A large portrait, expensive studio light, a minimalist
background, the magazine title and headlines across the top
and side. High-fashion style, crisp typography, a premium
look. Keep the face and features as accurate as possible.Me in another profession or era
Drop yourself into an unexpected role: an astronaut, a chef, a Renaissance figure, an anime hero. It earns a smile and a "how did you do that" - which means comments and reach.
Move the person from the photo into the role of
[an astronaut in orbit / a chef in the kitchen / a
Renaissance-era portrait]. Costume, surroundings, and light
to match the chosen role, realistic detail. Keep the facial
features and expression recognizable.3D cartoon avatar
You in a 3D cartoon style: big eyes, soft light, a friendly caricature. It works great as an avatar and a sticker, and it's easy to share.
Turn the photo into a 3D cartoon avatar in the style of a
modern animation studio: soft light, pleasant shapes, warm
colors, a waist-up close-up. Keep the recognizable facial
features, the hair, and the signature details.Product brand shot for your business
A format for anyone who sells services and courses. It's a clean product shot built around your offer: a book on a desk with coffee, a phone mockup with your offer, a workspace. It gives you a "sales" image with no shoot.
Create a stylish product shot for a personal brand:
[a book / a laptop with a site open / a phone with a
checklist] on a wooden desk, a cup of coffee, soft morning
light, warm tones, a cozy mood, top-down view. Realism,
high detail, room for a headline at the top.Travel postcard - "me where I've never been"
You against Tokyo, Santorini, or the snowy Alps. The format earns a "wow" and questions, and you don't have to fly anywhere. It works as a hook for a reel about dreams and goals.
Place the person from the photo against a backdrop of
[nighttime Tokyo / the streets of Santorini / the snowy
Alps]. Natural light to match the location, realistic
surroundings, a shot like a phone snap on vacation. Keep
the face, make the clothing fit the place.
Ready wording for dozens of jobs lives in the AI prompt library. And how to use shots like these in posts and carousels is in the piece on Instagram carousels.
Section 04How to make a viral photo in an evening - step by step
Now let's put it all together. Below is the route from a blank screen to a finished series of shots. Spelled out so that someone who has never once opened an AI tool can repeat it.
Pick a format and a tool
Open the formats section above and pick one or two that speak to you. For the first time, take the figurine or the cinematic portrait - they forgive mistakes. The tool to start with is Nano Banana inside Gemini: it's free and holds the face best. Go to the Gemini site or open the app and sign in.
Prep your photo
Find 1-3 of your own shots where the face is large, in focus, and in even light. A daytime selfie by a window works. Avoid dark, blurry, and group shots - there's nothing for the AI to grab onto. The sharper the source, the more accurate the likeness. If you want to go deeper on editing your own photos, check the separate guide on making viral photos with AI.
Upload the photo and paste the prompt
In the chat window, attach your photo and paste the prompt for the format you chose. Add one or two details about yourself: name, profession, favorite color. Send it. In 10-30 seconds you'll get the first version.
Review and ask for variations
The first shot is rarely perfect. Ask for more: "give me four different variations," "change the angle," "make the background darker." Pick the best one. This is the core skill - quickly dialing in the result by words. The first prompt almost never nails it, and that's normal.
Refine the details
On the chosen shot, fix the small stuff. Typical edits: "remove the extra finger," "make the caption readable," "add warm light from the left," "bring back my real face, it stopped looking like me." The AI changes only what you ask and keeps the rest.
Upscale and save for the platform
Ask for an upscale to high resolution (or run it through Krea). Reels and Stories need a vertical 9:16 frame, the feed wants a square, an article cover wants a horizontal. Just say it: "make a vertical 9:16 format for stories." Save the file.
Build a series for the week
Repeat with other formats. In one evening you can comfortably collect 5-10 shots: figurine, cinematic portrait, retro, a product shot for your offer. Spread them across the days - and you've got a week of visuals with not a single shoot.
What it looks like in a chat
To make it crystal clear, here's a real exchange with the AI - what you type and what it replies.
- Here's my photo. Turn me into a collectible figurine in a blister pack, and on the backing write "Anna · nutritionist."
- Done, here are four versions. Which one should I refine?
- The second one. Just make the packaging mint-colored and add a little jar of vitamins beside it.
- Changed the color and added the jar. Kept the face likeness.
- Great. Now make a vertical 9:16 shot for stories and bump up the quality.
- Here's the vertical version in high resolution.
The whole chat takes five minutes. No settings, sliders, or layers - just words.
Section 05Where to post viral photos and how to boost reach
The shot is ready - now it matters where you post it, so the format works, and how you frame it, so people share it.
- Reels and Stories. Vertical 9:16. From a series of shots, build a short slideshow video to a trending sound: swapping looks on the beat holds watch time. The first frame is the most gripping - it decides whether people stop or scroll.
- Threads and X. Text feeds love "how I made this." Post the result, and drop the prompt in the first comment - people save and share it for the how-to.
- Telegram / your channel. Here the photo works as an illustration for a post. Show the before and after, attach the prompt - the audience reads it as value, and shares go up.
- Pinterest. Long-tail traffic. Viral formats with a text caption (via Ideogram) collect saves for months and bring in followers from search.
Three moves that boost the reach of any shot:
- Show the process. A "here's how I made this in a minute" post with the prompt collects more shares than a pretty picture alone. People save the how-to.
- Invite the repeat. A direct call - "make one like this and tag me" - starts a wave: every repeat is reach inside someone else's audience.
- Keep the series in one style. Five shots in one format read as your signature and add up to a cohesive feed. A grab-bag of random images doesn't give that effect.
How to turn separate shots into a system of content is in the piece on a content plan built in one evening.
Section 06How to write a prompt for a photo - the formula
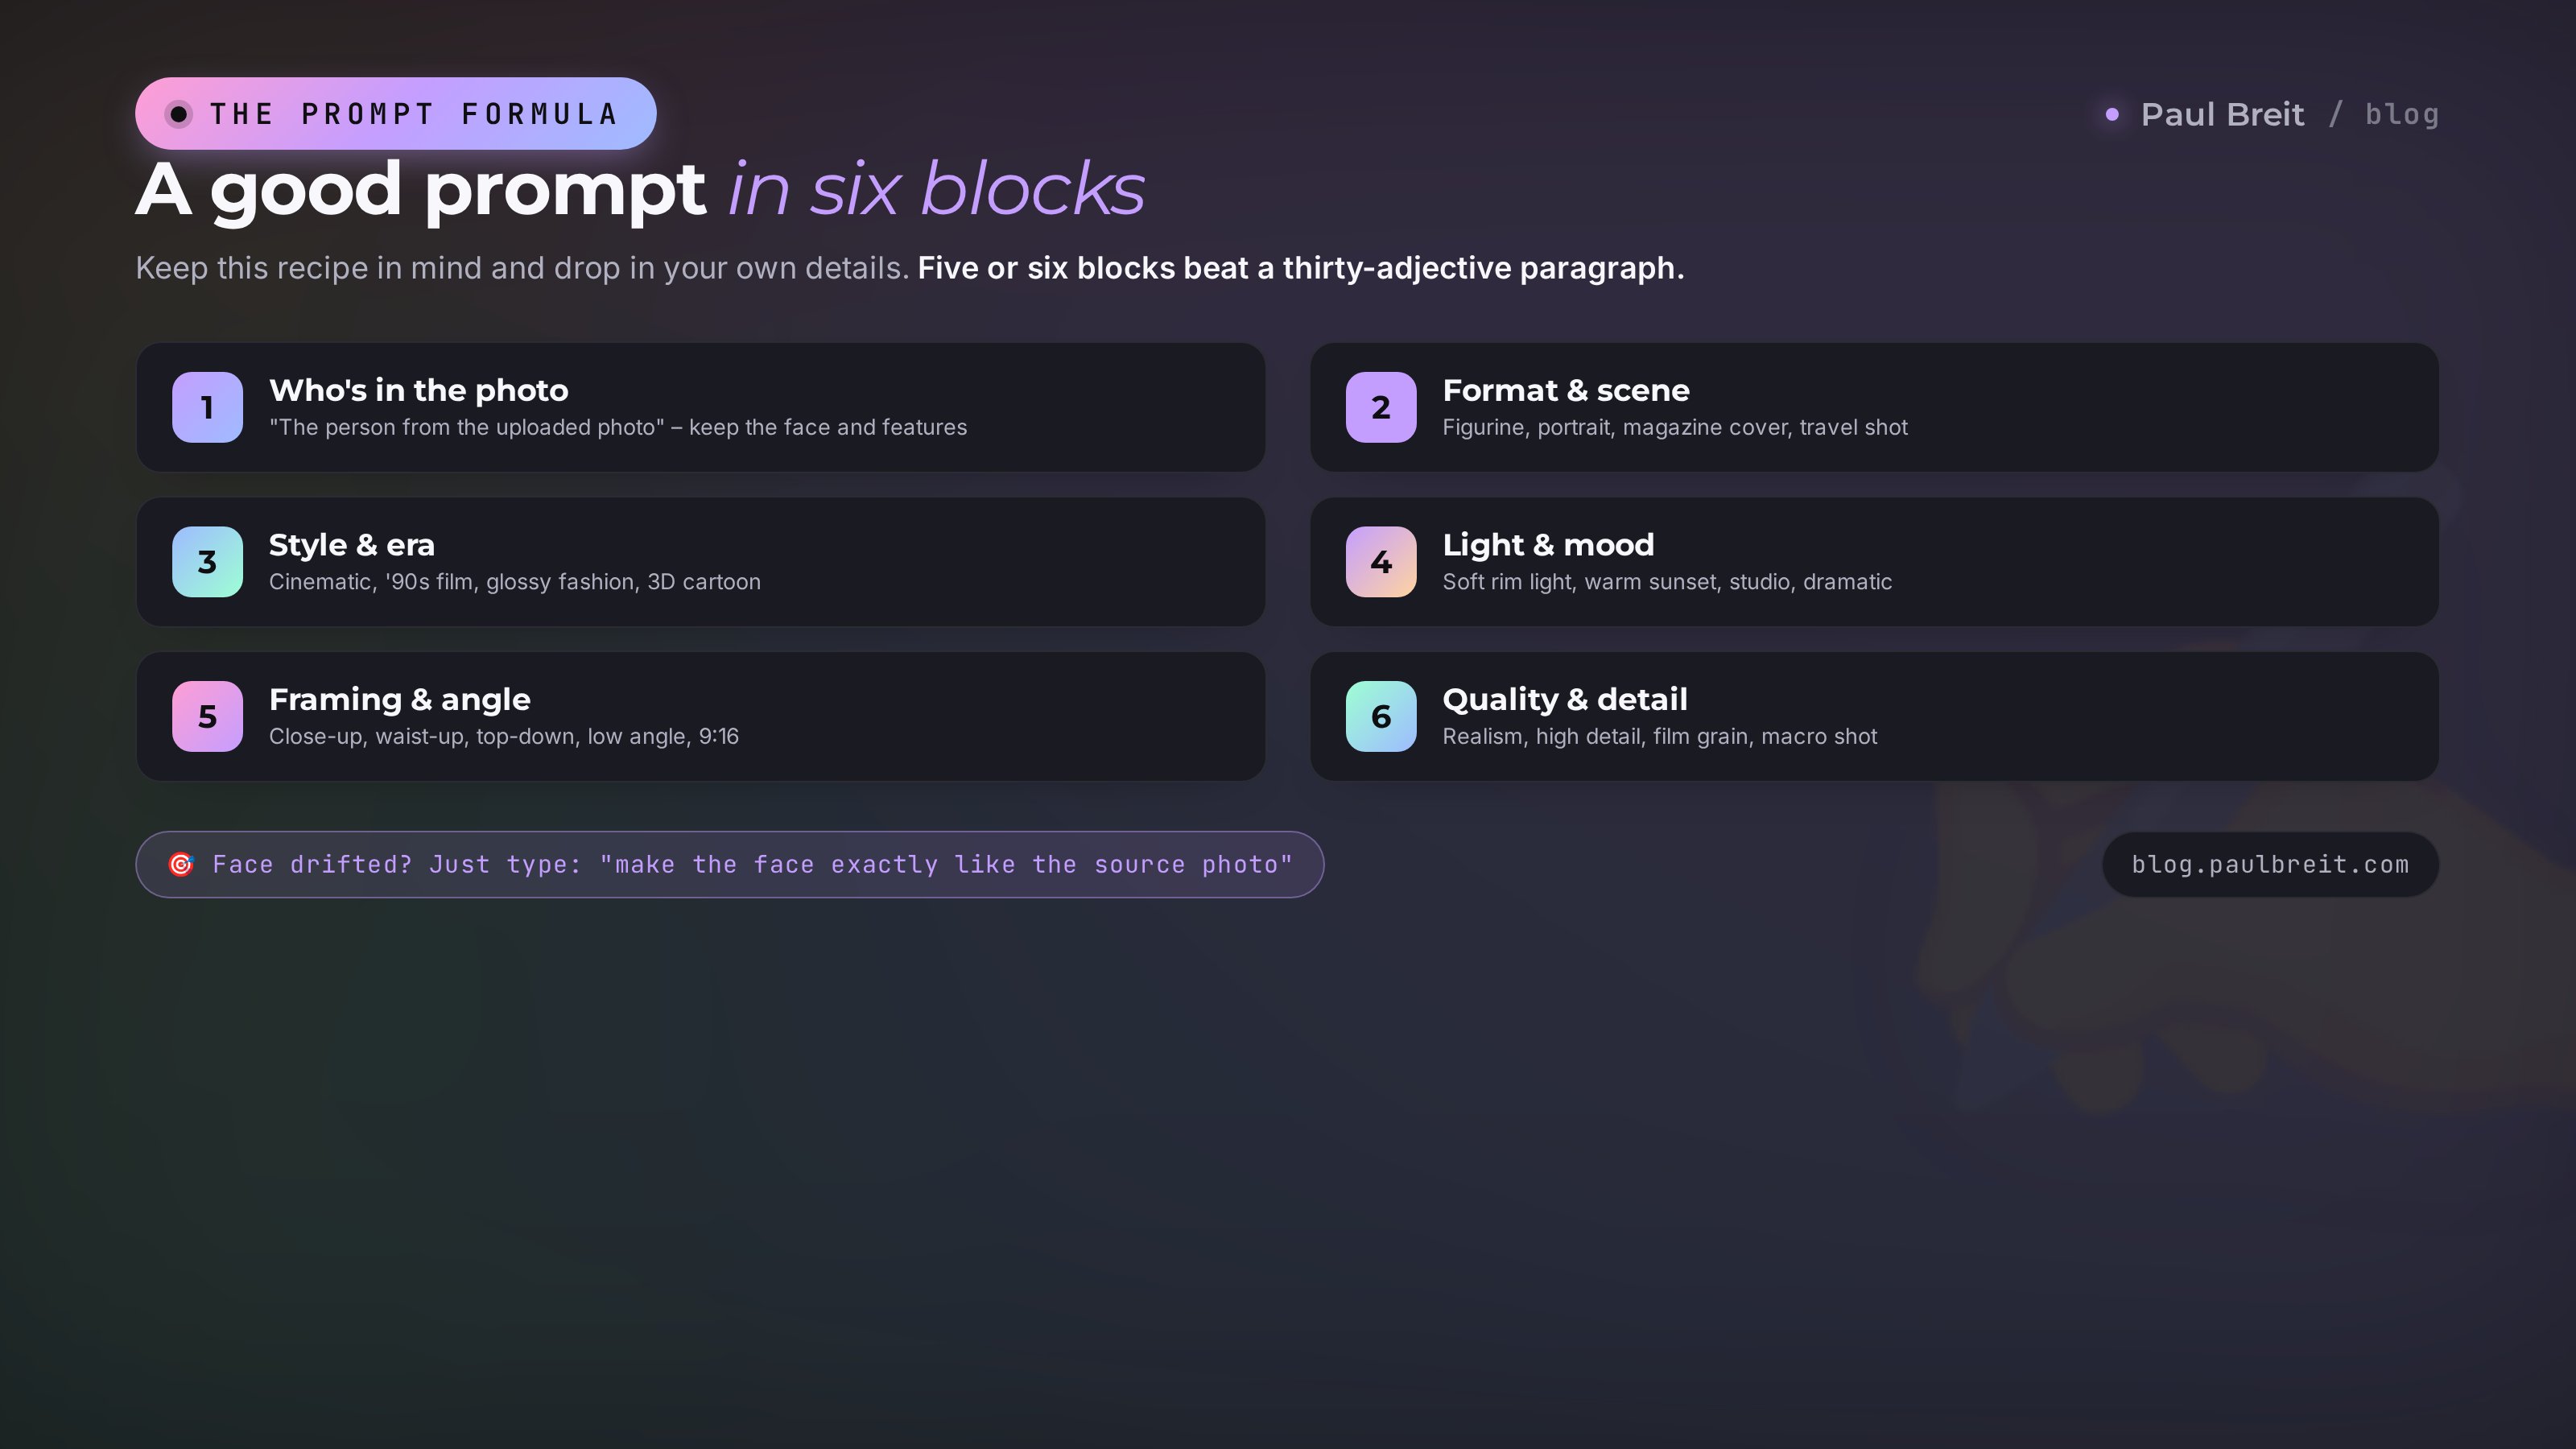
A good prompt is assembled from blocks. Keep this simple formula in mind and drop in your own details:
- Who's in the photo. "The person from the uploaded photo," keep the face and features. This is the base of the likeness.
- Format and scene. Figurine, portrait, cover, travel shot. The main thing that's happening.
- Style and era. Cinema, '90s film, glossy, 3D cartoon.
- Light and mood. Soft rim, warm sunset, studio, dramatic.
- Framing and angle. Close-up, waist-up, top-down, slightly from below, 9:16.
- Quality and detail. Realism, high detail, film grain, macro shot.
A prompt built to the formula looks like this:
The person from the uploaded photo, keep the face exactly →
a collectible figurine in a blister pack → store-toy style,
glossy packaging → studio light, macro → close-up of the
backing with a name → high detail.
A few moves that noticeably lift the result:
- Edit by words. "Warmer," "remove the hand in the background," "bring back my face" - the AI understands you like a human.
- Ask for variations. "Give me four different ones" saves time and gives you something to choose from.
- Nail the likeness. If the face drifts, say it straight: "make the face exactly like the source photo."
- Don't overload it. Five or six meaning-blocks beat a paragraph of thirty adjectives. The model gets lost in the noise.
A detailed breakdown of prompt structure is in the article on how to write prompts. It also has examples for text, images, and video.
Section 07Claude as a prompt generator
If you'd rather not come up with the wording, you can hand that job to a text AI. Claude is great at writing prompts for photos: describe what you want and get a dozen ready options that you just paste into an image generator.
You're a prompt engineer for photo generation. Come up with 10 prompts for viral photos of me for social media. I'm a nutritionist, I run a blog about healthy eating. Mix the formats: figurine, cinematic portrait, retro film, magazine cover. Each prompt should be ready to paste into Nano Banana, with a note to keep the face.
A minute later you've got a batch of prompts for your niche. You can sign up at claude.ai. How working with text AI is set up is in the guide on AI for writing.
When you upload your photo to an AI, you're handing it to a third-party service. Don't upload other people's photos without their consent, or ID documents with a face on them. For public viral shots that's not an issue, but remember: whatever goes into a tool may be stored there.
Section 086 mistakes that keep a photo from going viral
- A muddy source. A dark, blurry, or tiny face gives the AI nothing to hold onto, and the likeness drifts. Use a sharp shot in daylight.
- A wall-of-text prompt. A paragraph of thirty adjectives confuses the model. Five or six meaning-blocks to the formula work better than a long description.
- Chasing sterility. Flawless, glossy shots got old in 2026. Real grain, light leaks, and a little sloppiness grip harder. Add imperfections on purpose.
- One shot instead of a series. Virality is about repetition and recognition. One post sinks; a series of five shots in one format builds momentum.
- Yesterday's format. Trends burn out in two to three weeks. What popped a month ago gets a yawn today. Watch the feed and grab what's fresh.
- Losing the face. If the tool doesn't hold the likeness, the shot is pretty but it isn't you - and the "I want that too" effect never fires. For portraits use Nano Banana and ask it directly to keep the face.
Picked a format → opened Nano Banana → uploaded a sharp photo of yourself → pasted a prompt to the formula → asked for four variations → refined by words → made it 9:16 and upscaled → repeated with other formats → built a series for the week. Free, in an evening, with no photographer and no Photoshop.
Section 09Checklist: a viral photo in one evening
- ☐ Picked 2-3 formats from the trending list
- ☐ Prepped a sharp photo of yourself in daylight
- ☐ Opened a tool (to start - the free Nano Banana)
- ☐ Built a prompt to the six-block formula
- ☐ Asked for four variations and picked the best
- ☐ Refined the details by words, brought back the face likeness
- ☐ Made a vertical 9:16 and upscaled it for the platform
- ☐ Repeated and built a series of 5-10 shots
- ☐ Spread the shots across the days of the week and posted
That's it. Tonight you'll have the thing you were looking at yesterday in someone else's feed thinking "I can't do that." You can. Start with one shot - the rest follows on its own.
FAQFrequently asked questions
Which AI makes the best viral photos in 2026?
For viral photos with your own face, the best pick is Nano Banana inside Gemini: free, holds your likeness accurately, and renders up to 4K in seconds. For the most beautiful, artistic frame people reach for Midjourney V7; for edits by plain words, ChatGPT is handier. Start with Nano Banana - it covers most jobs.
Can I make a viral photo for free?
Yes. Nano Banana in Gemini and image generation in ChatGPT both work free with daily limits, and Ideogram and Leonardo have free tiers. To start and build a series for the week you don't have to pay. Paid plans are for lifting the limits and getting top quality.
Will the AI keep my face or make a different person?
If you upload a sharp, well-lit photo and ask it to keep the face, the likeness holds up well, especially in Nano Banana. If the face drifts, type a fix: "make the face exactly like the source photo." The sharper the source, the more accurate the result.
How many photos can I realistically make in one evening?
In one evening you can comfortably get 5-10 finished shots in different formats. One shot from idea to final takes 5-10 minutes: upload the photo, prompt, pick a variation, refine, upscale. That's enough visuals for a whole week of content.
How do I keep the same face across a whole series of shots?
Use the same clean source photo for every format and add the line "keep the face and features from the uploaded photo" to each prompt. In Nano Banana the likeness carries over well; if one shot drifts, ask it to match the source again before you move on to the next format.
Which format is going viral most right now?
In 2026 the steady winners are collectible figurines in blister packs, cinematic portraits, and film-grain retro with real grain. Trends burn out in two to three weeks, so watch your own feed and grab fresh formats while they're peaking.
Do I need Photoshop after the AI?
No. Every edit is done by words right in the chat: change a color, remove a stray detail, add light, make it a vertical 9:16 frame. You don't need an image editor even for the final fit to the platform.
Is it legal to post these photos, and could I get banned?
Posting shots of your own face is fine. Trouble starts if you use someone else's face without consent or pass off a generated image as a real event. For personal viral content with your own photo there's no risk. Don't upload other people's photos or ID documents into third-party tools.