Krea AI: AI Images and Video in Real Time – How to Use It in 2026
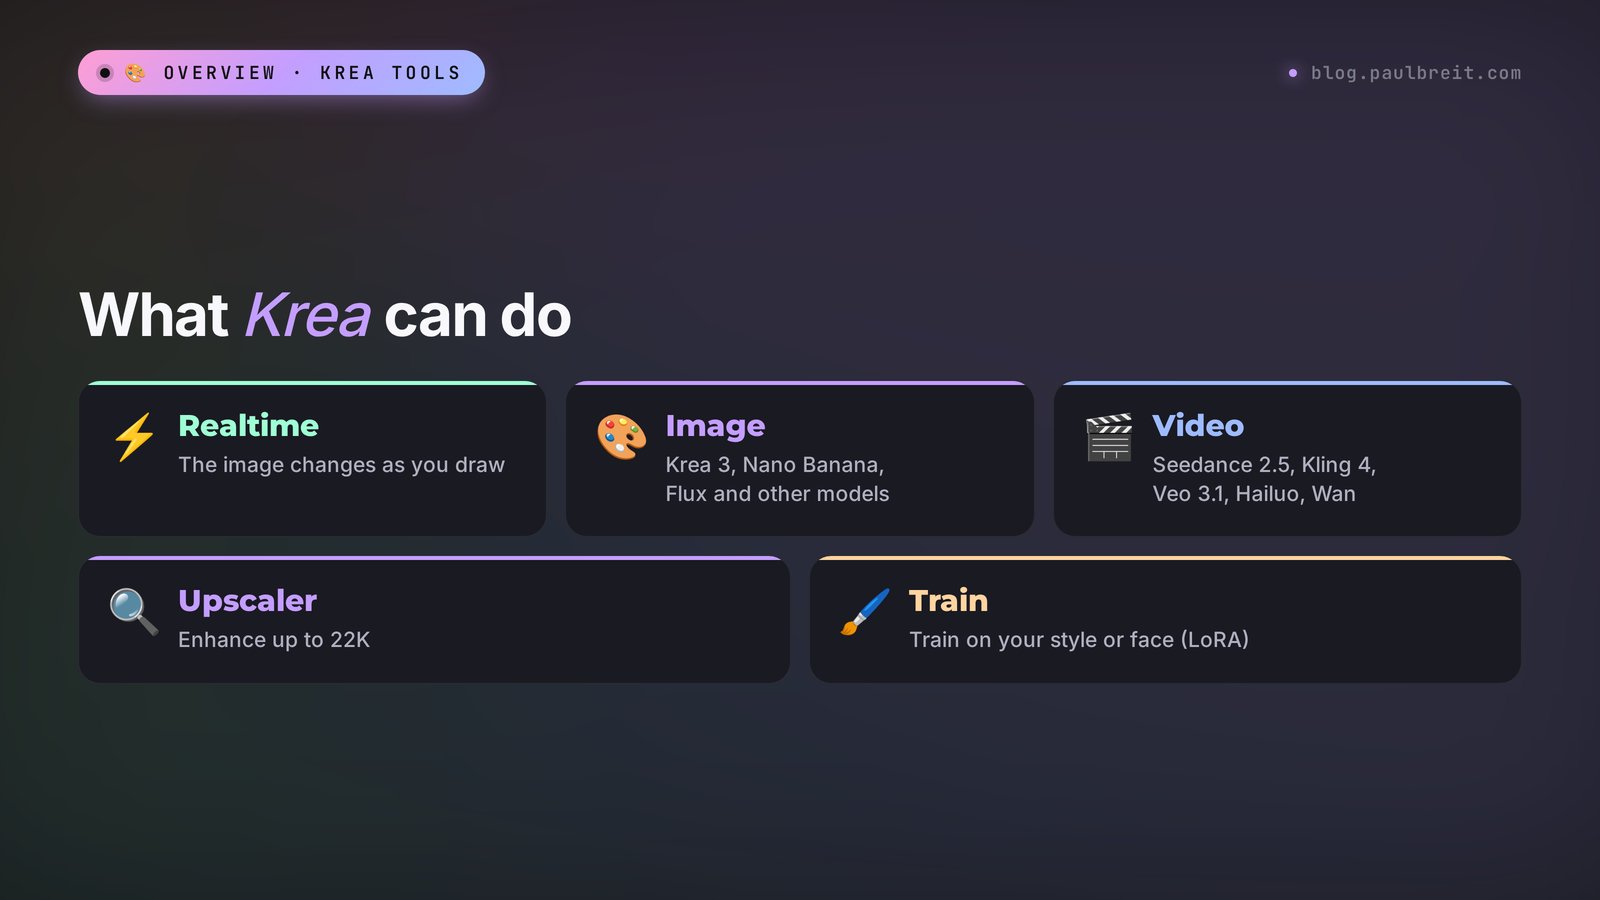
Krea AI is a tool where the image changes right in front of you while you move shapes on a canvas or edit your prompt. On top of that, one window holds dozens of models: Krea 3, Nano Banana, and Flux for images, Seedance, Kling, and Veo for video, upscaling to 22K, and training on your own style. Here's how to use Krea in 2026: what you get for free, what it costs, how to sign up, how to make your first image and your first video, and how not to burn through all your units in one evening.
To use Krea AI, open krea.ai and sign in with Google. You get 100 free units a day. For an image, open Image, pick a model (Krea 3 is the default), paste an English prompt, and hit Generate. For an image in real time, open Realtime and draw shapes on the canvas – the finished picture appears on the right instantly. For video (on a paid plan), open Video, pick Seedance or Kling, and upload a photo or describe the scene. Paid plans start at $9 a month and take a regular card.
Anyone who sells services, courses, and consulting and makes their own visuals for their content. A coach builds a set of matching post covers in five minutes. A nutritionist makes mouth-watering breakfast shots for reels. An interior designer sketches a room with simple rectangles in Realtime and shows the client three options on the spot. A therapist turns a calm landscape into a short video for stories. A photographer restores old shots to print size. All of it in one tab, without a zoo of subscriptions for every model.
What's inside
- What Krea AI is and what it can do
- Krea for free: what you get for $0
- Pricing and how units work
- How to sign up and pay
- Your first image in Krea, step by step
- Realtime: the image draws as you move your mouse
- Video in Krea: from text and from a photo
- Enhance and upscale to 22K
- Train: teach Krea your style
- Claude writes your Krea prompts
- Ideas for different niches
- If something goes wrong
- Krea, Midjourney, Leonardo, and Nano Banana
- The whole path in a minute
- FAQ
Section 01What Krea AI is and what it can do
Krea is an American tool for AI images and video. It got famous for one thing nobody else had for a long time: generation in real time. You put a circle and a couple of rectangles on a canvas, type "sunset over the sea," and a split second later a finished picture appears on the right. Move the circle up and the sun rises. Change the rectangle's color and the sea changes. No more waiting 30 seconds for every variation.
Since then Krea has grown into a full workshop. Today it's closer to an aggregator: inside you'll find Krea's own models and models from Google, ByteDance, Kuaishou, and others. You pay for one subscription and pick the model for the job from a dropdown. If you make your own content, that's handy: no need to juggle five accounts and five cards.
Here's what's on the site as of November 4, 2026, by section of the main menu:
| Tool | What it does | When to use it |
|---|---|---|
| Realtime | The image updates instantly while you draw or change the prompt | Finding an idea and a composition, sketches for a client |
| Image | Images from text and from reference pictures. Models: Krea 3, Krea 2, Nano Banana, Flux, Ideogram, and more | Covers, post illustrations, banners |
| Image Editor | Edits a finished image in plain words: "remove the person on the left," "make it evening" | Polishing a good result without generating from scratch |
| Video and Image to Video | Video from a description or from a photo. Models: Seedance 2.5, Kling 4, Veo 3.1, Hailuo, Wan, Runway, Luma | Short clips for reels and stories, bringing photos to life |
| Upscaler | Enhances and enlarges images and video, up to 22K on paid plans | Print, large banners, old photos |
| Train | Trains a model on your images: a style, a product, a face | A series of visuals in one recognizable style |
| Krea Agent | You describe the task, and the agent picks the models and makes the images, video, and sound | When you don't want to figure out which model is best |
| Nodes | A chain builder: one model passes its result to the next | Repeat tasks, once you're comfortable |
A bit of recent news, so the new names on the list make sense. In May 2026 Krea released its own image model, Krea 2, and in June it published the weights openly. On October 15, 2026, Krea 3 came out – a model for editing images in plain words. It takes up to eight reference images and can change one specific area of a picture. Since that day Krea 3 has been the default model in Image. Krea Agent arrived in September 2026 and is available on every plan.
The interface is in English, so below I name the buttons exactly as they're labeled on the site. Nothing to be scared of: there aren't many buttons, and in half an hour you'll be clicking through them without looking.
Section 02Krea for free: what you get for $0
Krea does have a free plan, and it doesn't need a card. I checked the terms on the official krea.ai/pricing page on November 4, 2026:
- 100 units a day. The counter resets every 24 hours, and leftovers don't roll over.
- Krea 3 and Krea Agent. The main image model and the agent are available right away. The other image models (Nano Banana, Flux, and the rest) are locked on the free plan.
- Full Realtime access. The most fun part of Krea works without paying.
- Limited upscaling. You can enhance an image, but going up to 22K is paid-only.
- What's missing: video models, training your own model (LoRA), the Nodes builder, and a commercial license. Free-plan images are fine for testing and personal use. For ads, sales posts, and client work you need a paid plan.
What this means in practice. The free plan is enough to find out whether Krea is for you: play with Realtime, make a batch of test images on Krea 3, try enhancing an old photo. As soon as images go into content that sells your services, or into ads, move to at least Basic – that's where the commercial license kicks in. There's no video on the free plan at all.
Start with Realtime and play with shapes for ten minutes – it shows you right away why people love Krea. Then make three or four images in Image for a real task, like a cover for tomorrow's post. Spend the rest in the Upscaler: enhance one of your old photos and compare it with the original. If you like it, that's the moment to grab a paid plan and try video.
Section 03Krea pricing and how units work
All of Krea's paid plans run on units (compute units). It's a single in-app currency: you spend it on images, video, and upscaling. How many units a task takes depends on the model, the resolution, and the length of the video. Since October 26, 2026, Krea shows an estimated cost before you run a task, right next to the generate button. Get in the habit of checking it every time, especially for video.
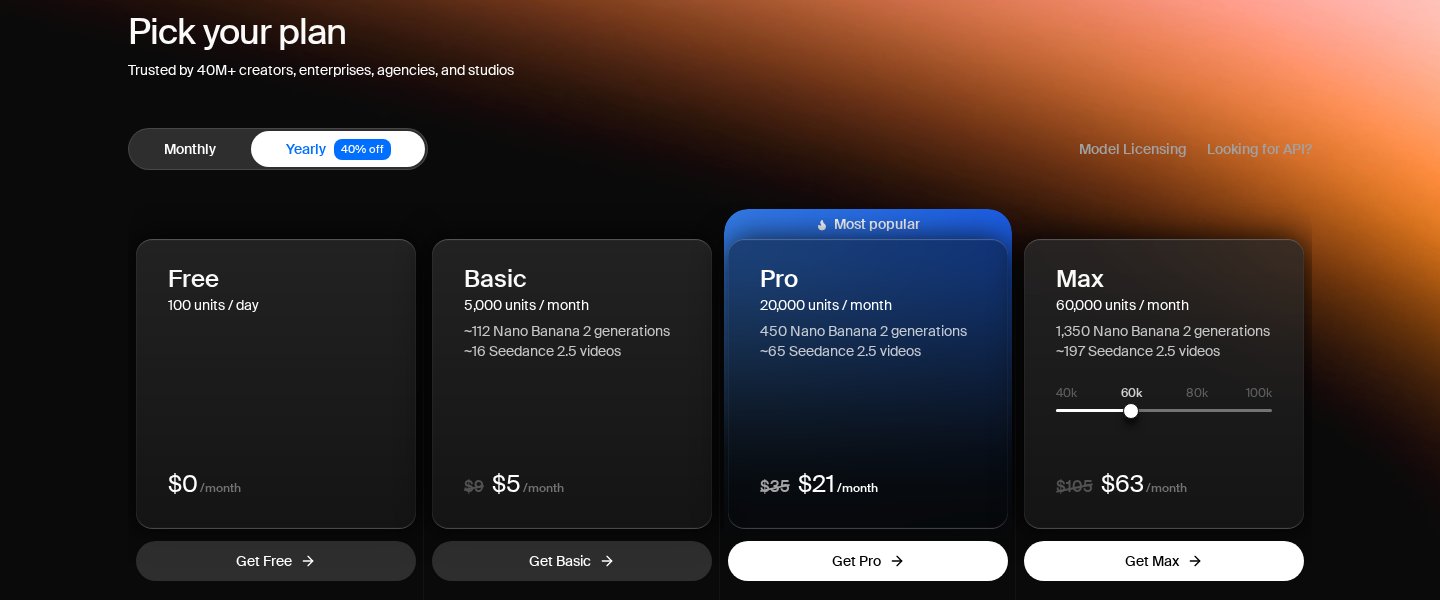
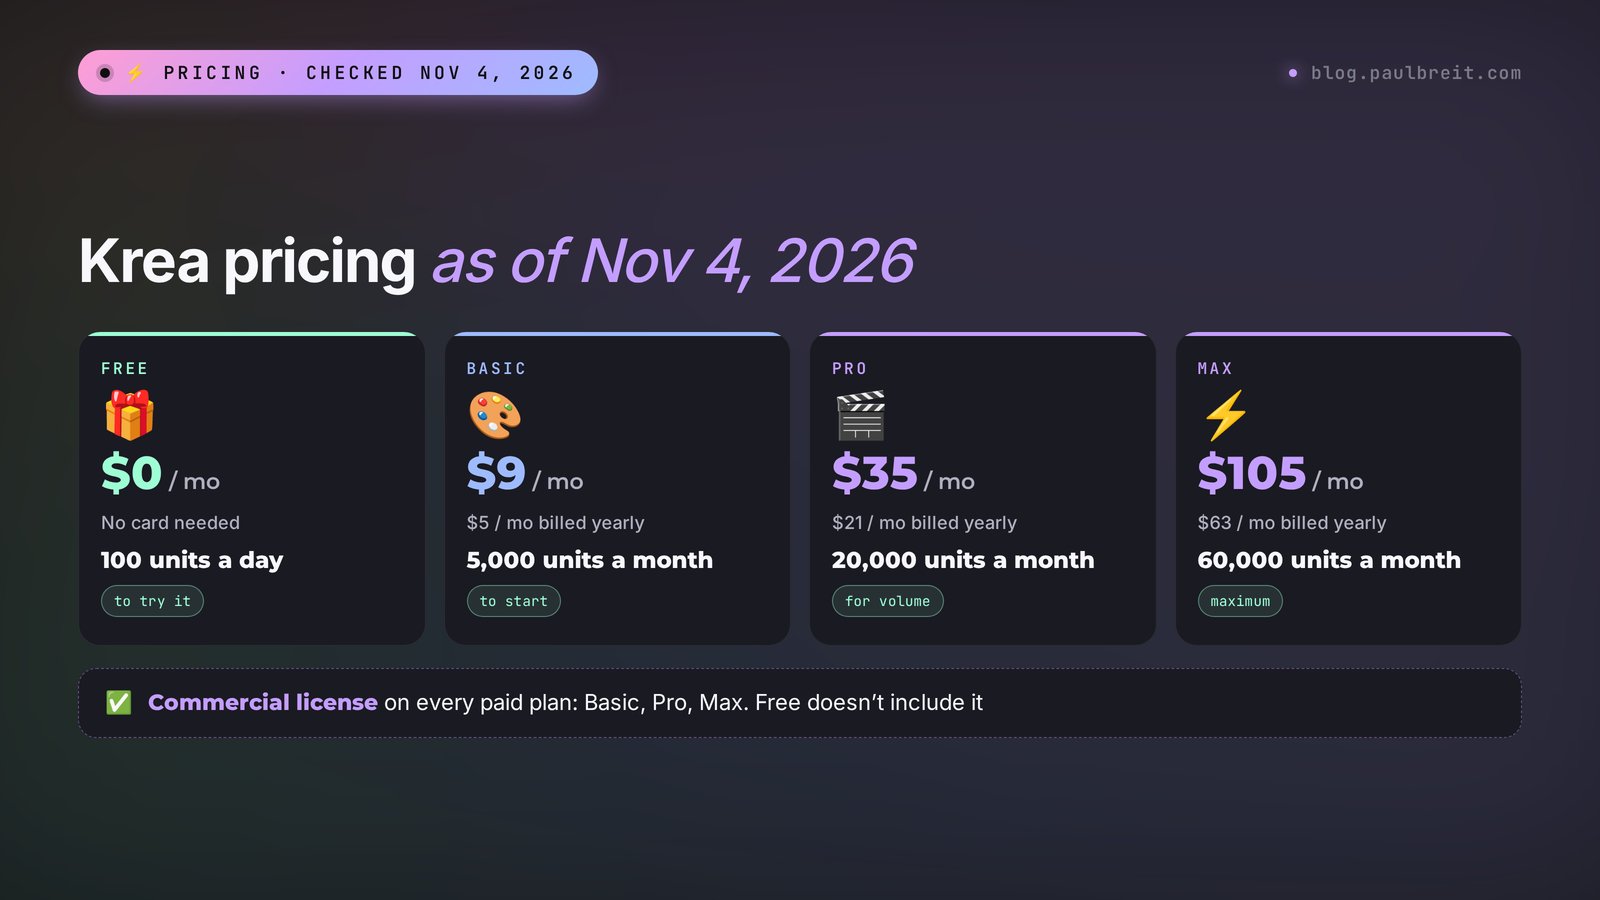
| Plan | Monthly price | Billed yearly | Units | What matters |
|---|---|---|---|---|
| Free | $0 | – | 100 a day | Krea 3, Krea Agent, and Realtime, limited upscaling. No video, no training, no commercial license |
| Basic | $9 | $5 a month | 5,000 a month | All image models, selected video models, upscaling to 22K, training on 50 images, commercial license |
| Pro | $35 | $21 a month | 20,000 a month | All video models, 8 images and 4 videos in parallel |
| Max | $105 | $63 a month | 60,000 a month | Unlimited training on up to 2,000 images, 8 videos in parallel |
| Business | $200 | $160 a month | 80,000 a month | Up to 50 team seats, roles, and access permissions |
To make units less abstract, Krea converts them into actual outputs right on the pricing page. Basic's 5,000 units come to roughly 112 images on Nano Banana 2 or about 16 videos on Seedance 2.5. Pro's 20,000 units are about 450 images or 65 videos. Max's 60,000 units are about 1,350 images or 197 videos. You can see how much pricier video is: one Seedance video costs about as much as seven images.
Which plan to pick if you make content for your own channels:
- Only images for posts. Try it on free, and for publishing in content that sells, go with Basic: it adds the commercial license and all the image models. Billed yearly, it comes to $5 a month – less than a cup of coffee.
- Images plus short videos for reels. Pro. Basic only opens selected video models, and Seedance and Veo chew through 5,000 units fast.
- You're a designer or sell visuals to clients. Pro or Max. Max makes sense if you train a lot of your own models and run videos in batches.
A money-saving tip: pay monthly for the first month. See how many units you really use in a week, and only then switch to yearly billing. Yearly is almost half the price, but you won't want to be locked into it if the tool doesn't click for you.
Section 04How to sign up for Krea and pay
Krea is a US company, so getting started is simple: a browser, a Google account, and a regular card if you go paid. Payments run through Stripe. Here it is step by step.
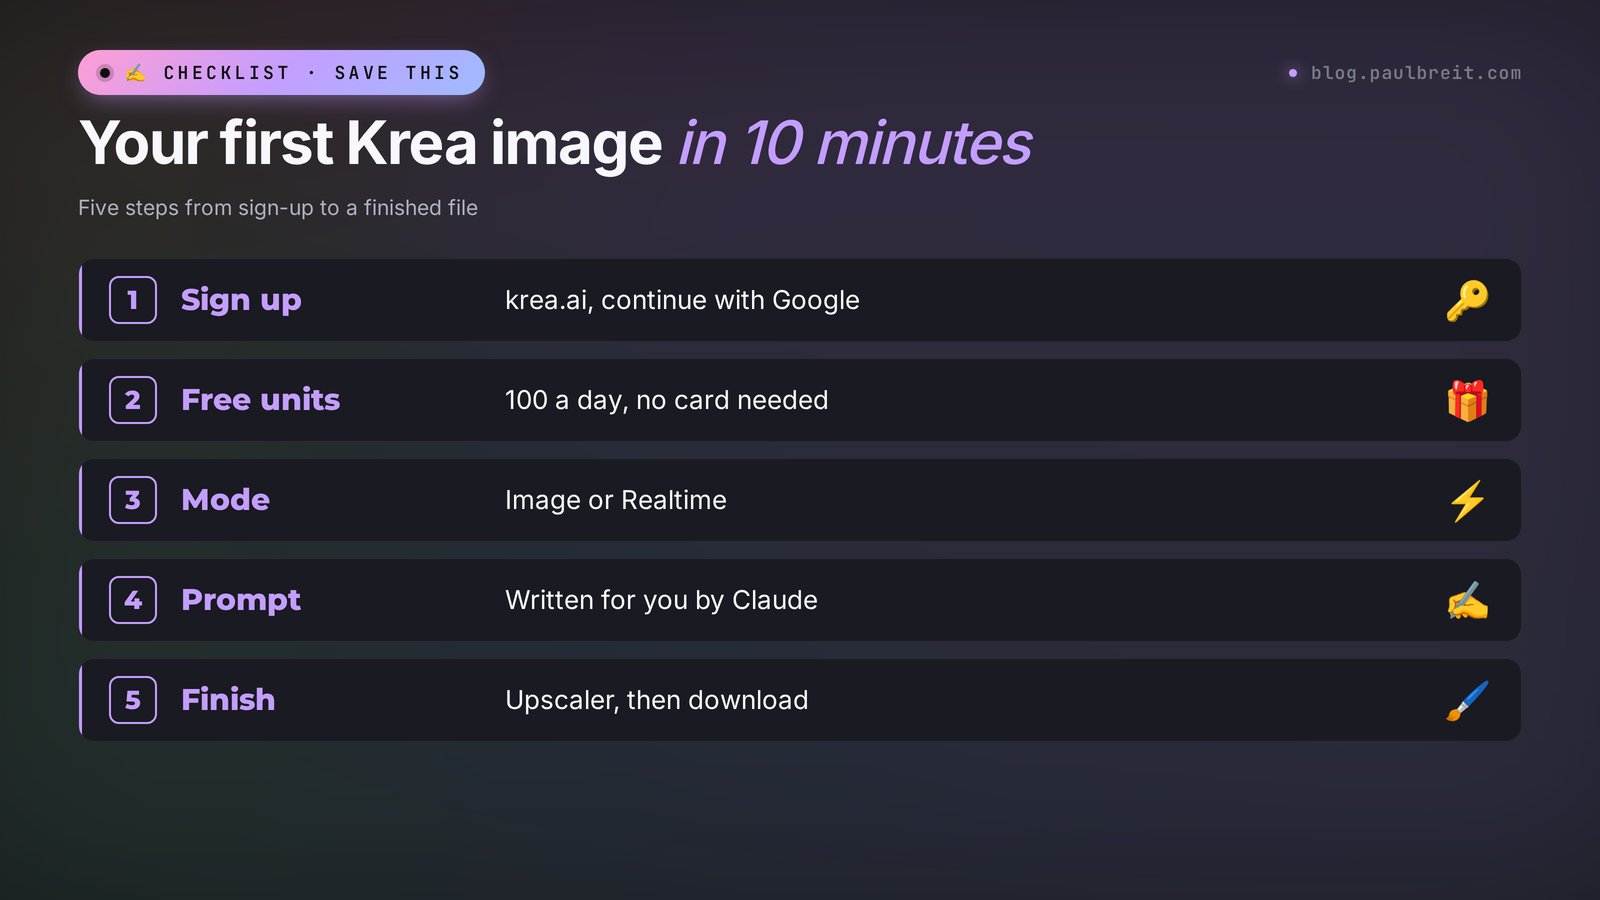
Step 1. Sign up with Google
Open krea.ai and click Sign up. The fastest way in is to continue with Google, so you don't have to create and confirm a separate password.
Step 2. Check your free units
Once you're in, a unit counter appears in the top right corner. Your 100 daily units are credited right away, no card needed. If the counter is empty, refresh the page.
Step 3. Pay with a regular card when you're ready
When the free units stop being enough, open the pricing page, pick a plan, and pay with an ordinary credit or debit card. Start with monthly billing: that way you can see your real unit usage before committing to a year.
If you've already signed up for other AI image and video tools, this will all feel familiar. I walk through the same kind of setup in my guide to Midjourney and my Kling guide.
Section 05Your first image in Krea, step by step
The most common task is a post cover. A real example: you're a nutritionist, and tomorrow you're posting about quick breakfasts. You need a square image with no text, so a headline can go on top later.
Step 1. Open Image
Click Image in the left menu or on the home screen. You'll see a window with a prompt field at the bottom and a gallery of your images above it.
Step 2. Pick a model
Next to the prompt field there's a dropdown of models. Krea 3 is the default, and it's plenty to start. Nano Banana handles text in images well and understands complex descriptions. Flux gives you photorealism. Start with Krea 3 and try the others once you know what you're missing. On the free plan only Krea 3 is available in the list; the other models unlock on paid plans.
Step 3. Choose the format
Set the aspect ratio in the same place. For a feed post – 1:1 or 4:5, for stories and reels – 9:16, for a blog cover or YouTube – 16:9. Pick the format up front: cropping a finished image later is painful because it eats the composition.
Step 4. Write a prompt
A prompt is a description of the image. Write it in English – that's what the models understand most precisely. A good prompt answers four questions: what's in the frame, where, what light, what style. Example: "Top-down photo of a healthy breakfast on a light wooden table: oatmeal with berries, a cup of coffee, a sliced avocado toast, soft morning window light, minimal style, lots of empty space at the top for a title". You don't have to write these yourself – below I'll show how Claude does it.
Step 5. Check the cost and hit Generate
Before running, Krea shows how many units the task will take. For images it's not much. Click Generate, and a few seconds later the variations appear in your gallery.
Step 6. Polish the best result
Like the image, but one detail is in the way? Open it and ask for the edit in words: "remove the coffee cup," "make the light warmer." Krea 3 changes only what you asked for and leaves the rest as it was. That's faster and cheaper than regenerating twenty times hoping to get lucky.
A small secret that noticeably lifts quality: reference images. You can attach one or more pictures to the prompt, and Krea 3 will take the style, color, or composition from them. Krea 3 accepts up to eight. If your brand has its own colors and mood, attach two or three of your past best covers, and the new images will look like one series. For more ready-made wording for images, see my collection of AI photo prompt ideas.
Section 06Realtime: the image draws as you move your mouse
Realtime is the reason people heard about Krea in the first place. Here's how it works: on the left is a canvas where you draw simple shapes or drop in a base image, and on the right is the finished picture, which changes with every move you make. No Generate button, no waiting. Move a shape and the image is already different.
Step 1. Open Realtime
On the home screen, click Realtime. A screen split into two halves opens.
Step 2. Write a short prompt
The text field is at the bottom. Short descriptions work well here: "cozy coffee shop interior, warm light." The shorter the prompt, the more closely the image follows your shapes on the canvas.
Step 3. Draw shapes
Pick a circle, a square, or a brush and place them on the canvas. A shape's color hints to the model what goes there: a dark brown rectangle at the bottom becomes a table, a yellow circle at the top becomes a lamp. Move them, stretch them, change colors, and watch the image on the right change.
Step 4. Play with the strength slider
In the settings there's a slider that decides how tightly the model sticks to your canvas. Lower – more of the AI's imagination; higher – the image follows your shapes almost one to one.
Step 5. Save a good frame and enhance it
Realtime draws fast, so its quality is lower than regular generation. Once you catch a composition you like, save the frame and send it to the Upscaler or into Image as a reference. That way you get your composition and full quality.
You're not limited to the canvas. The base for Realtime can be an uploaded image, and the list of sources also includes your camera and screen capture: you hold a mug up to the camera, and on screen it's already sitting in a fairy-tale forest. For your channels this is great behind-the-scenes material: record your screen while you "draw" a cover, and you've got an addictive clip for stories.
Finding the idea. Regular generation is a lottery: you write a prompt, wait, it's off, you rewrite, you wait again. In Realtime you flip through a hundred compositions in five minutes and see which one grabs you. An interior designer can show a client room options live on a call, a therapist can find a calm image for a meditation, and a coach can land on the visual for a challenge cover before they even know what they want.
Section 07Video in Krea: from text and from a photo
Krea has no video model of its own yet, and it gathers nearly all the strong ones from other labs: Seedance 2.5, Kling 4, Veo 3.1, Hailuo, Wan, Runway, Luma. That's Krea's main advantage for video – you can compare models on the same task without opening an account for each one. I have a separate breakdown of each: Seedance, Kling, Hailuo.
Video in Krea is paid-only: Basic opens selected video models, Pro and Max open all of them. The most reliable path for a beginner is to bring a finished image to life. Text-to-video from scratch misses the idea more often. A starting image gives the model the subject, the light, and the composition from the start.
Step 1. Make or upload a frame
Take a good image from Image or your own photo. Set the format for the platform right away: 9:16 for reels and stories.
Step 2. Open Video and pick a model
Click Video or Image to Video and upload your frame. To start, pick Kling or Hailuo from the model list: they give good motion and use fewer units. Save Seedance and Veo for clips where camera work and complex motion matter.
Step 3. Describe the motion
In a video prompt, describe what happens in the image (the image itself is already there): "steam rises slowly from the coffee cup, camera slowly moves closer, soft morning light." One or two actions per clip. Ask for five movements at once and the model makes a mess.
Step 4. Choose the length and run it
Start with the shortest length, usually 5 seconds. Check the unit cost by the button – for video it's many times higher than for an image. If you like the motion, then go longer or higher quality.
Video takes longer than an image, from a minute to several. While you wait, you can prep the next frame. The finished clip downloads with the download button in the gallery. Stitching several clips into a reel with music and captions is easier in a video editor. If you're not sure how to describe the motion, grab ready wording from my collection of AI video prompts – they work for the models inside Krea too.
Section 08Enhance and upscale to 22K
The Upscaler is Krea's quiet hero. It enlarges the image and fills in detail along the way: skin, fabric, leaves, wood grain. A blurry 800-pixel photo turns into a shot you wouldn't be embarrassed to print on a banner.
- Open the Upscaler (in the Edit menu or from the home screen).
- Upload an image: your own photo, an old shot, or a frame from Realtime.
- Choose how much to enlarge it. On the free plan enlargement is limited; on paid plans it goes up to 22K.
- Set the enhancement strength. Low keeps the original almost as is; high adds more detail but can change small things, like facial features.
- Run it and compare with the original using the before-and-after slider.
Be careful with portraits: at high strength the AI sometimes "improves" a face so much that the person looks slightly different. For your own photos, keep the strength low. The Upscaler works for video too: you can lift the quality of a short clip before posting.
Lots of people have dozens of great event photos shot on a phone five years ago. They still work for a social post, but not for a website banner or a printed roll-up. The Upscaler puts them back to work. A photographer can also offer clients restoration of old family photos as a separate service.
Section 09Train: teach Krea your style
Train lets you train your own model on your images. Technically it's a LoRA: a small add-on that remembers a style, an object, or a face. After training, you write a prompt and Krea draws in your style or with your product in the frame.
What it's good for in practice:
- Your brand style. Upload 15–30 of your covers, and every new image comes out in the same palette and manner. Your feed starts to look like a magazine with one consistent style.
- A product. A baker uploads photos of their cakes from different angles and then places them in any scene: a holiday table, a shop window, a guest's hands.
- A face. Upload your photos, and Krea puts you on covers in any look. I wrote in detail about AI photoshoots from your own photo in my collection of AI photoshoot prompts.
Training is available only on paid plans. How to train: open Train, choose the type (style, object, or character), upload the images, and run it. On Basic and Pro you can upload up to 50 images, on Max up to 2,000. Quality beats quantity here: 20 varied, sharp shots give a better result than 50 near-identical ones. For a face, use photos with different light, angles, and clothes, and skip sunglasses and heavy filters.
Train the model only on your own photos or on photos of people who have agreed to it. Making images with the faces of celebrities or people you know without their permission is a straight path to trouble with both the platform's rules and the law.
Section 10Claude writes your Krea prompts
The weakest spot for Krea beginners is the prompt. You know what you want, but describing it so the AI gets the light, the angle, and the mood is hard. This is where Claude helps a lot: you explain the task in your own words, and it hands you a ready prompt for the model. You can sign up at claude.ai.
A prompt you can copy and adapt:
You're helping me make images in Krea AI. I'm a nutritionist and I run an Instagram account about eating well for busy women. I need a cover for a post called "3 five-minute breakfasts that stop sugar cravings." Format 4:5, no text in the image, free space at the top for a headline. Style – light, warm, real, not glossy. Write 3 prompt options in English for the Krea 3 model, each with a different scene. Under each one, explain in one plain line what the result will look like. Also tell me what to add to the prompt if the image comes out looking too much like an ad.
Option 1. Overhead shot of three simple breakfasts on a light linen tablecloth: Greek yogurt with berries and nuts, a boiled egg with whole-grain toast and avocado, overnight oats in a glass jar. Soft natural morning light from a window on the left, gentle shadows, warm neutral tones, real home kitchen feel, slight imperfections, crumbs on the cloth. Empty light space in the top third of the frame. 4:5 vertical.
In plain words: a top-down view of three breakfasts on a linen tablecloth, homey window light, empty space at the top for the headline.
Option 2. A woman's hands holding a ceramic bowl of oatmeal with banana slices and cinnamon, sitting at a small kitchen table, a laptop and a phone slightly out of focus in the background, early morning, warm window light, cozy and calm mood, candid lifestyle photo, muted pastel colors. Clean soft wall in the upper part of the frame. 4:5 vertical.
In plain words: hands holding a bowl of oatmeal with a laptop behind – a hint at a busy life, no face in the frame.
Option 3. Close-up of a quick breakfast on a wooden board: cottage cheese with honey and walnuts, a few apple slices, a cup of tea with steam, a kitchen timer showing five minutes next to it. Bright soft daylight, shallow depth of field, natural colors, editorial food photography, not glossy. Plenty of blurred background at the top for a headline. 4:5 vertical.
In plain words: a close-up of cottage cheese with honey and a five-minute timer – it reads as "quick" instantly.
If it comes out too much like an ad: add "amateur phone photo, natural clutter, no studio lighting, no perfect styling" at the end and remove the words "editorial" and "professional."
What worked well: all three prompts answer "what, where, what light, what style," each one builds in space for the headline and the format, and in the third the five-minute timer points straight at the post's topic. What I'd fix before running it in Krea: in the second option the laptop and phone may distract, so drop them if the post isn't about work. One more tip: save this Claude prompt as a template. Next time you only swap the niche and the post topic.
Two more Claude prompts that come in handy:
- Video prompt: "Here's an image I made in Krea (attach it). Write an English prompt for Kling inside Krea to bring it to life as a 5-second video for stories. One calm camera move and one movement in the frame. Give me two options."
- A series in one style: "I'm making 10 covers for posts about anxiety and sleep. Write a shared style block for the prompt, in English, that I'll paste at the end of each one so the covers look like one series. Then give me 10 short scenes for the post topics."
If you want to know why I pick Claude for tasks like these, take a look at my Claude vs ChatGPT comparison.
Section 11Ideas for different niches
To keep Krea from becoming one more toy for a single evening, tie it to your real tasks. Here's what you can do this week:
| Niche | What to do in Krea | Which tool |
|---|---|---|
| Coach | A matching set of covers for a challenge, a before-and-after visual for a sales post | Image + Train on a style |
| Therapist | Calm landscapes for meditations and stories, brought to life as short videos | Realtime + Video |
| Nutritionist | Mouth-watering food shots for recipes and reels about nutrition | Image + Image Editor |
| Interior designer | Room sketches for a client right on the call, three options in five minutes | Realtime |
| Photographer | Restoring old photos, enlarging for print | Upscaler |
| Baker or maker | Your product in festive scenes for ads | Train on a product + Image |
| Tutor | Lesson illustrations and lead magnet covers | Image |
| Fitness trainer | Short video intros for reels, program covers | Image to Video |
And a separate story: AI design as a profession. Everyone who sells on social media needs good images and clips, and many would rather pay than figure it out themselves. Konstantin Spirin, one of our clients, built a business on this: he set up a lead magnet funnel, ran search ads, warmed up his audience through a Telegram channel, and launched his own course on making money with AI design. The result – about $10,700. Krea is handy for this kind of work precisely because one window has images, video, and print-ready upscaling.
Section 12If something goes wrong
| What happened | Why | What to do |
|---|---|---|
| The site won't load or keeps spinning | A shaky connection or a stale browser cache | Refresh the page, clear the browser cache, try another browser |
| Sign-up doesn't finish | The Google sign-in window was closed or blocked | Allow pop-ups for krea.ai and continue with Google again |
| The card is declined | The bank flagged the online charge | Approve the charge in your bank app or try another card |
| Units ran out in half an hour | They went to video or heavy models at high quality | Check the cost by the button before running, test video at 5 seconds on lighter models |
| A video model isn't available | Free has no video, Basic opens only selected video models | Pick another model from the list or move to Pro |
| The image is off-target | The prompt is too vague or not in English | Ask Claude to turn your task into an English prompt: what's in the frame, where, light, style |
| The text in the image is garbled | Not every model draws letters well | Make the image without text and add the headline on top in an editor, or use Nano Banana |
| The face looks like someone else after upscaling | Enhancement strength was too high | Lower the strength and run it again |
| Realtime ignores your shapes | The prompt is too long or the strength slider is too low | Cut the prompt to 3–5 words and raise the canvas strength |
Section 13Krea, Midjourney, Leonardo, and Nano Banana: which to choose
Krea often gets compared with other image tools. Honestly, there's no single best one for everything. The choice depends on what you make most often.
| Tool | Strength | Who it suits |
|---|---|---|
| Krea | Realtime, dozens of image and video models in one subscription, upscaling to 22K | People who make both images and video and want it all in one place |
| Midjourney | A recognizable artistic look | People for whom the beauty of the image itself matters most |
| Leonardo AI | A generous free plan, lots of ready-made styles | People who are just trying things and don't want to pay |
| Nano Banana | Editing photos in words, handles text and faces well | People who need to edit their own photos. By the way, it's also inside Krea |
My advice: if you want one tool for both images and short videos, start with Krea. If you only make banners and covers with text, also check out my guide to the AI banner maker – it's a separate path with no complicated prompts. And if visuals are your main job, my overview of AI tools for designers and photographers will come in handy.
Section 14The whole path in a minute
- Open krea.ai and sign up with Google.
- Get 100 free units a day, no card needed. Video and commercial use require a paid plan.
- Play in Realtime to find the composition.
- In Image, pick Krea 3, set the format, and paste an English prompt. Claude writes the prompt.
- Polish the best result in words in the Image Editor.
- For video, upload a frame to Image to Video and start with Kling or Hailuo at 5 seconds.
- Enhance the result in the Upscaler and download.
- Short on units – Basic at $9 a month; need every video model – Pro at $35. Pay with a regular card.
FAQFrequently asked questions
Is Krea AI free?
Yes, Krea has a free plan. It gives you 100 units a day with no card, the Krea 3 model, Krea Agent, full Realtime access, and limited upscaling. Video, other image models, training, and a commercial license come only with paid plans, from $9 a month. Terms checked on krea.ai/pricing on November 4, 2026.
How do I sign up for Krea AI?
Open krea.ai, click Sign up, and continue with Google. Your free units are credited right away, no card needed. For a paid plan, pick it on the pricing page and pay with a regular credit or debit card. Start with monthly billing to see your real unit usage.
How much does Krea AI cost?
As of November 4, 2026: Basic $9 a month or $5 billed yearly, 5,000 units; Pro $35 or $21, 20,000 units; Max $105 or $63, 60,000 units; Business $200 or $160, 80,000 units. Unit cost depends on the model and resolution, and Krea shows it before you run a task.
Does Krea AI support other languages?
The Krea interface is English only. Some models understand prompts in other languages, but English gives more precise results. If English isn't your first language, describe the task to Claude in your own language and ask for a ready English prompt for Krea.
Can I use Krea images in ads?
Yes, on paid plans. According to the pricing page, the commercial license is included in Basic, Pro, Max, and Business, and the free plan doesn't have it. Also make sure your images don't contain other people's faces without consent, other brands' logos, or recognizable characters you don't have rights to.
What is Krea Realtime?
It's a mode where the image updates instantly while you draw shapes on the canvas or change the prompt. The canvas is on the left, the finished image on the right. The base can be a drawing, an uploaded image, your camera, or your screen. Realtime is great for finding a composition, and the final image is best enhanced in the Upscaler.